3D printing

Resin Printing FAQ

Basic FAQ

  1. What is resin printing? Resin printing, also known as stereolithography, is a type of 3D printing technology that uses photopolymer resin to create detailed and high-resolution 3D models.
  2. What are the benefits of resin printing? Resin printing can produce highly detailed and accurate prints with a smooth surface finish. It is also capable of printing intricate designs and thin walls that may be difficult to achieve with other 3D printing technologies.
  3. What are the disadvantages of resin printing? Resin printing can be more expensive than other 3D printing technologies and may require more post-processing. It can also produce harmful fumes and requires proper ventilation and safety measures.
  4. What materials can be used for resin printing? Resin printing typically uses photopolymer resin, which can come in a variety of colors and formulations, including standard, flexible, and high-temperature resins.
  5. What software is required for resin printing? Resin printing requires a slicer software, which is used to convert 3D models into printable files. There are several slicer software options available, including Chitubox, PrusaSlicer, and Simplify3D.
  6. What types of objects can be printed with a resin printer? Resin printing can be used to create a wide range of objects, including figurines, jewelry, dental models, and prototypes for product design.
  7. How long does it take to print a resin object? The printing time for a resin object can vary depending on the size, complexity, and resolution of the print. Small prints can take as little as a few minutes, while larger and more complex prints may take several hours or even days.
  8. How do I clean and maintain my resin printer? Resin printers require regular cleaning and maintenance to ensure optimal performance. This includes cleaning the resin tank, replacing the FEP film, and cleaning the print bed. It is also important to properly store the resin and dispose of it in a safe and environmentally friendly manner.

Advanced FAQ

  1. What is the optimal temperature for printing with resin? The optimal temperature for printing with resin can vary depending on the type of resin being used. Generally, resin prints best at a temperature between 20°C and 30°C, but it is important to check the manufacturer’s recommendations for the specific resin being used.
  2. How do I calibrate my resin printer? Calibrating a resin printer involves several steps, including leveling the build platform, adjusting the Z-axis, and checking the exposure time. It is important to follow the manufacturer’s instructions carefully to ensure accurate and consistent printing.
  3. How do I prevent resin from sticking to the build platform? To prevent resin from sticking to the build platform, it is important to ensure that the build platform is properly leveled and cleaned before each print. Using a release agent, such as a spray-on mold release or PTFE spray, can also help prevent sticking.
  4. How do I store and handle resin? Resin should be stored in a cool, dry place away from direct sunlight and heat sources. It should be handled with care and protective equipment, such as gloves and safety glasses, should be worn to avoid skin and eye contact. Resin should also be properly disposed of in accordance with local regulations.
  5. How do I troubleshoot printing issues? Printing issues can be caused by a variety of factors, including improper calibration, insufficient exposure time, or resin contamination. It is important to carefully review the printer settings and process to identify and address the root cause of the issue. In some cases, it may be necessary to adjust the printing parameters or change the resin formulation to achieve the desired results.

FAQ Resin Printing CAD

  1. What CAD software is best for 3D resin printing? -The best CAD software for 3D resin printing depends on your skill level and specific needs. Some popular options include Autodesk Fusion 360, Tinkercad, SolidWorks, and Blender.
  2. How do I export a 3D model from my CAD software to a file that my resin printer can read? -The most common file formats for resin printers are STL and OBJ. Most CAD software will have the option to export models in these formats.
  3. What are the recommended design guidelines for 3D resin printing? – Design guidelines for 3D resin printing include keeping wall thickness above the minimum recommended thickness, adding supports where necessary, and avoiding overhangs greater than 45 degrees.
  4. How can I optimize my CAD model for resin printing to avoid failed prints? -To optimize your CAD model for resin printing, you can adjust settings such as layer height, exposure time, and lift height in your printer’s software.
  5. What is the best way to add support structures to my 3D models in CAD software? -Most CAD software has tools for adding support structures, such as automatic support generation or manual support placement.
  6. How can I create hollow objects in CAD software for resin printing? -To create a hollow object in CAD software for resin printing, you can create a shell by subtracting the interior volume of your model from the exterior volume.
  7. What is the minimum wall thickness for 3D resin printing? -The minimum wall thickness for 3D resin printing varies depending on the resin and printer being used. Generally, walls should be at least 0.4 mm thick.
  8. How can I create intricate details in my 3D models for resin printing? -To create intricate details in your 3D models for resin printing, you can use tools such as fillets, chamfers, and booleans to create complex shapes and features.
  9. Can I use 2D images or photographs to create a 3D model in CAD software for resin printing? -Some CAD software has tools for creating 3D models from 2D images or photographs, such as Autodesk ReCap Photo or 123D Catch.
  10. How can I make sure my CAD model is watertight before printing with resin? -To make sure your CAD model is watertight before printing with resin, you can use the “check for errors” or “analyze” tool in your CAD software to detect any holes or gaps in the model’s surface.

The future of 3D printing

Exciting developments in the field and its potential applications.

The future of 3D printing is incredibly promising, with many exciting developments in the field and a vast range of potential applications. Here are some of the most significant developments and potential applications:

  1. Bioprinting: 3D printing is being used to create living tissues, organs, and even bones. This technology has the potential to revolutionize the field of medicine, allowing doctors to create custom implants and prosthetics for their patients.
  2. Construction: Large-scale 3D printing is being used to build houses, bridges, and other structures. This technology could significantly reduce the cost and time needed to build infrastructure.
  3. Food printing: 3D printers are being used to print food, creating intricate designs and shapes that would be impossible with traditional cooking methods. This technology has the potential to revolutionize the food industry, allowing chefs to create unique dishes that are visually stunning.
  4. Aerospace: 3D printing is being used to create lightweight, high-strength parts for airplanes and spacecraft. This technology could significantly reduce the weight of these vehicles, making them more fuel-efficient and reducing their carbon footprint.
  5. Fashion: 3D printing is being used to create customized, one-of-a-kind fashion items, including clothing, shoes, and jewelry. This technology has the potential to transform the fashion industry, allowing designers to create unique pieces that are tailored to individual customers.
  6. Education: 3D printing is being used in classrooms to teach students about science, engineering, and design. This technology allows students to create physical models of their ideas, helping them to better understand complex concepts.
  7. Art: 3D printing is being used to create intricate sculptures and other art pieces that would be impossible to create using traditional methods. This technology has the potential to transform the art world, allowing artists to create pieces that are more complex and detailed than ever before.

Overall, the future of 3D printing is incredibly exciting, with numerous potential applications across a wide range of industries. As the technology continues to develop, we can expect to see even more innovative uses for 3D printing in the years ahead.

Post-processing

Removing supports, sanding, and painting your prints.

Post-processing is an important step in 3D printing that helps improve the appearance and functionality of your printed parts. Here are some common post-processing techniques:

  1. Removing Supports: Supports are structures added to 3D prints to prevent overhanging parts from sagging or collapsing during the printing process. After printing, the supports need to be removed by carefully cutting or pulling them off the printed part. This can be done using a pair of pliers, tweezers, or a sharp knife. Be sure to remove all the supports carefully without damaging the printed part.
  2. Sanding: Sanding helps smooth out the surface of the printed part, removing any rough edges, bumps, or imperfections left behind by the printing process. It is recommended to use sandpaper with progressively finer grits, starting with a coarse grit (e.g. 100 grit) and gradually moving up to a fine grit (e.g. 800 grit). Sanding can be done manually or with the help of a rotary tool or sanding machine.
  3. Painting: Painting can be done to add color, texture, and protection to your printed parts. Before painting, make sure the surface of the printed part is clean and free of any debris or dust. Apply a primer to the part to help the paint adhere better. Then, apply the desired paint using a brush, spray can, or airbrush. Allow the paint to dry completely before handling the part.

Other post-processing techniques include smoothing with acetone vapor, filling gaps with filler or putty, and polishing with a polishing compound. The choice of post-processing technique will depend on the material used for printing, the desired finish, and the intended use of the printed part.

Enhancing your prints

Using supports, rafts, and other printing techniques to improve print quality.

When it comes to 3D printing, there are several techniques you can use to enhance the quality of your prints. Supports, rafts, and other printing techniques can help to improve print quality and ensure that your prints come out looking great.

  1. Supports: Supports are structures that are printed along with your model to provide additional support for overhanging parts. They are typically printed in the same material as your model, but can also be printed in a different material if necessary. Supports can be automatically generated by your slicing software, or you can add them manually to your model using CAD software. Removing supports after printing can sometimes leave marks on the surface of your model, but they are usually easy to clean up with some sandpaper or a file.
  2. Rafts: Rafts are thin layers of material that are printed underneath your model to provide additional adhesion and stability. They are especially useful for printing large or complex models, or models with small contact points. Rafts can be automatically generated by your slicing software, or you can add them manually using CAD software. Removing rafts after printing is usually easy, and they can help to prevent warping and other print issues.
  3. Brims: Brims are similar to rafts, but they are printed around the edges of your model rather than underneath it. They can help to prevent warping and provide additional adhesion, especially for models with small contact points. Brims are usually easy to remove after printing, and can be generated automatically by your slicing software.
  4. Layer Height: Changing the layer height of your prints can also help to improve print quality. A lower layer height will result in smoother surfaces and finer details, but will also increase print time. A higher layer height will result in faster prints, but with lower resolution and surface quality. Finding the right balance between print quality and speed is key to achieving great results.
  5. Bed Leveling: Ensuring that your print bed is level is critical for achieving good print quality. Uneven or warped beds can cause parts of your model to be under-extruded or over-extruded, resulting in poor quality prints. Most 3D printers have automatic bed leveling systems, but it’s always a good idea to manually check and adjust the bed level before each print.
  6. Cooling: Cooling is also important for achieving good print quality. A fan can be used to cool the filament as it’s being extruded, which can help to prevent stringing and other print issues. Many slicing software programs have settings for controlling fan speed during printing, which can be adjusted to achieve the best results for your specific model.

By using these techniques, you can significantly improve the quality of your 3D prints and achieve the results you’re looking for.

3D printing materials

An overview of different types of filaments and their properties.

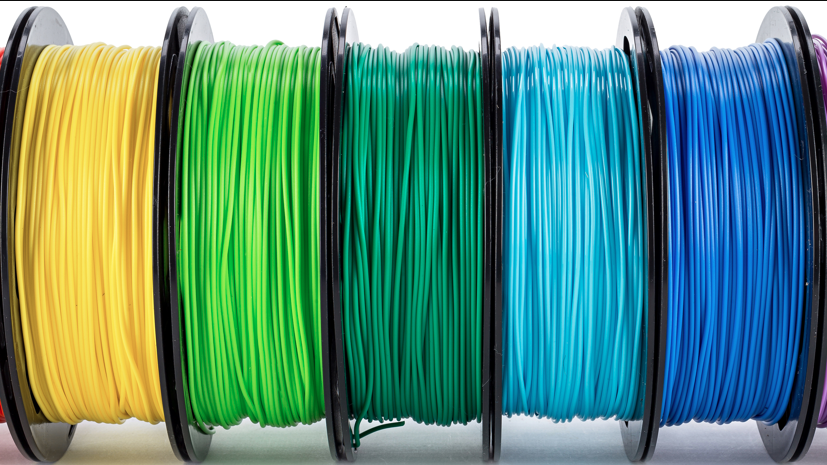
3D printing materials, also known as filaments, are the materials used to create physical objects using a 3D printer. There are several types of filaments available for 3D printing, each with their own unique properties and applications. Here is an overview of some of the most commonly used filaments:

  1. PLA (Polylactic Acid) – PLA is one of the most popular 3D printing materials. It is made from renewable resources and is biodegradable, making it an environmentally-friendly option. PLA is easy to use, has a low melting point, and is ideal for printing detailed objects. However, it can be brittle and may not be suitable for objects that will be exposed to high temperatures or stress.
  2. ABS (Acrylonitrile Butadiene Styrene) – ABS is a strong and durable filament that is often used to create functional objects. It has a high melting point and is resistant to impact and heat. However, it can be difficult to print with due to its tendency to warp and emit fumes during printing.
  3. PET (Polyethylene Terephthalate) – PET is a strong and lightweight filament that is commonly used to create functional parts. It has a high melting point and is resistant to impact and moisture. However, it can be difficult to print with due to its tendency to warp.
  4. Nylon – Nylon is a strong and durable filament that is ideal for creating flexible and functional objects. It has a high melting point and is resistant to impact and abrasion. However, it can be difficult to print with due to its tendency to absorb moisture and warp.
  5. TPU (Thermoplastic Polyurethane) – TPU is a flexible and rubber-like filament that is ideal for creating objects that require a high level of flexibility, such as phone cases and toys. It has a low melting point and is resistant to impact and abrasion. However, it can be difficult to print with due to its tendency to string and warp.
  6. PVA (Polyvinyl Alcohol) – PVA is a water-soluble filament that is commonly used as a support material. It dissolves in water, making it easy to remove from the final print. PVA is ideal for creating complex objects that require support structures. However, it can be expensive and may require special storage conditions to prevent moisture absorption.

These are just a few examples of the many different filaments available for 3D printing. When choosing a filament, it’s important to consider the desired properties of the final object and the printing capabilities of your 3D printer.

Slicing and printing

Preparing your 3D model for printing and starting your first print.

Preparing your 3D model for printing involves several steps, including slicing your model and preparing your printer for printing. Here are the basic steps to follow:

  1. Choose your slicing software: There are many slicing software options available, such as Cura, PrusaSlicer, and Simplify3D. Choose the software that is best for your printer and your needs.
  2. Import your model: Once you have chosen your slicing software, import your 3D model into the software. Most slicing software will accept a variety of file formats, such as .STL, .OBJ, or .AMF.
  3. Position and scale your model: Use the software’s tools to position and scale your model to fit your printer’s build area. Make sure your model is not too large or too small for your printer.
  4. Add supports (if needed): If your model has overhangs or other features that need support during printing, add support structures using the software’s tools.
  5. Slice your model: Once you have prepared your model, use the software to slice it into layers that your printer can print. This involves setting parameters such as layer height, print speed, and infill density.
  6. Save your sliced file: Save your sliced file in a format that your printer can read, such as .gcode.
  7. Load your sliced file onto your printer: Once your sliced file is saved, load it onto your printer either via a USB drive or over a network connection.
  8. Calibrate your printer: Before you start printing, make sure your printer is properly calibrated. This includes setting the bed level, adjusting the nozzle height, and ensuring that your printer is properly calibrated for filament type and temperature.
  9. Start printing: Once your printer is calibrated and your sliced file is loaded, start your print job. Make sure to monitor your printer during printing to ensure that everything is working properly.
  10. Remove your finished print: Once your print is complete, carefully remove it from the printer’s bed. Use a spatula or other tool to gently pry the print from the bed, taking care not to damage the print or the printer’s bed.

Congratulations! You have successfully prepared and printed your 3D model.

3D design basics

Creating your first 3D model with simple CAD software.

Creating your first 3D model can be a rewarding and exciting experience. Here are some basic steps to get started:

  1. Choose a CAD (Computer-Aided Design) software: There are many CAD software programs available, some free and some paid. Examples of free software include Tinkercad and Fusion 360, while paid options include SolidWorks and AutoCAD. Choose a software that fits your budget and level of experience.
  2. Understand the software interface: Spend some time exploring the software and understanding the basic tools available. Look for tutorials or user guides online to help you get started.
  3. Choose your object: Decide what you want to model. It’s a good idea to start with something simple, like a cube or a cylinder.
  4. Create your basic shape: Using the software’s basic shapes tools, create your chosen shape. For example, in Tinkercad, you can choose a cube from the shape library, adjust its dimensions, and then place it on the workplane.
  5. Edit your shape: Use the software’s editing tools to modify your basic shape. For example, you can use the push/pull tool to create an extrusion or the rotate tool to create a twist.
  6. Add details: Use the software’s additional tools to add details to your model. For example, you can use the hole tool to create a hole in your object or the fillet tool to add rounded edges.
  7. Export your model: Once you’ve finished creating your model, export it in a suitable file format. The most common file formats for 3D printing are STL and OBJ.
  8. Prepare your model for printing: If you plan to 3D print your model, you may need to prepare it for printing using a slicer software. This involves slicing the model into layers and adding supports if necessary.

These are some basic steps to create your first 3D model with simple CAD software. Remember to start with a simple object and take your time to learn the software’s tools and features.

Types of Resin Printers

Resin printers have become a popular choice for 3D printing enthusiasts who want to create highly detailed and intricate objects. Resin printing is a process that uses UV light to harden liquid resin, layer by layer, until the desired object is formed. There are different types of resin printers available on the market, each with their own strengths and weaknesses. In this post, we will delve into the different types of resin printers available, including SLA, DLP, and MSLA printers.

SLA (Stereolithography) printers are the oldest type of resin printers. They use a laser to harden the resin and create the object layer by layer. SLA printers can produce highly detailed objects with a smooth finish. However, they are slower than other types of printers and require a lot of maintenance.

DLP (Digital Light Processing) printers use a digital projector to shine a light onto a vat of liquid resin, hardening it layer by layer. DLP printers can create objects quickly and with high accuracy. They can also print multiple objects at once, which is a great advantage for mass production. However, the objects produced by DLP printers may have a rough surface finish.

MSLA (LCD-based Stereolithography) printers are a newer type of resin printer that use an LCD screen to project the UV light and harden the resin layer by layer. MSLA printers are faster than SLA printers and produce smoother objects than DLP printers. They also have lower maintenance requirements than SLA printers. However, MSLA printers may have more limited build volume compared to DLP printers.

When choosing a resin printer, it is important to consider the type of object you want to create, the level of detail you require, and your budget. Each type of printer has its own strengths and weaknesses, so it is important to do your research and choose the right one for your needs.

Here are some factors to consider when choosing a resin 3D printer for beginners:

  1. Price: Resin 3D printers can vary in price, with some models costing several thousand dollars while others are more affordable. For beginners, it’s generally recommended to start with a more budget-friendly option until they have gained more experience and have a better understanding of their specific needs.
  2. Ease of use: Some resin 3D printers can be more complicated to use than others, with more advanced features and settings. For beginners, it’s often recommended to choose a printer with a simple interface and user-friendly software.
  3. Build volume: The build volume of a printer determines the maximum size of the objects that can be printed. Beginners may not need a large build volume, but it’s important to choose a printer that is suitable for the specific types of projects they are interested in.
  4. Customer support: It’s important to choose a resin 3D printer from a reputable manufacturer that offers good customer support, as beginners may have more questions or need assistance getting started.

Based on these factors, some popular resin 3D printers for beginners include the Anycubic Photon, Elegoo Mars, Creality LD-002R, and Phrozen Sonic Mini. These printers are affordable, user-friendly, and offer good quality prints for their price range.

  • Zortrax – Provides high-quality and reliable resin printers for professionals and businesses.
  • Elegoo: Elegoo is a popular brand known for their affordable, high-quality resin for 3D printing. They offer a variety of colors and types of resin for different applications.
  • Anycubic: Anycubic is another well-known brand in the 3D printing industry, offering a range of high-quality resins for their own line of 3D printers as well as other popular models.
  • Siraya Tech: Siraya Tech is a premium brand that specializes in high-performance resins for 3D printing. Their products are known for their strength and durability, making them a popular choice for functional prototypes and production parts.
  • Monocure 3D: Monocure 3D is an Australian company that produces high-quality resins for 3D printing, including their popular Rapid and Standard resins.
  • Nova3D: Nova3D is a Chinese manufacturer of 3D printers and resins, offering a variety of colors and types of resin for different applications.
  • MatterHackers is a 3D printing and digital manufacturing company that offers a range of 3D printing supplies, including resin. Their selection includes a variety of colors and finishes from top brands.
  • 3D Universe is a retailer that offers a range of 3D printing products, including printers, filaments, and resins. They carry resins from well-known brands like Formlabs, Elegoo, and Monocure.
  • Printed Solid is a 3D printing company that offers a range of products for 3D printing enthusiasts. Their selection of resins includes standard resins, flexible resins, and specialty resins for specific applications.
  • MakerBot is a leading manufacturer of 3D printers and related accessories. They offer a variety of resins for use with their printers, including standard resins, tough resins, and specialty resins for specific applications. Their resins are designed to work seamlessly with MakerBot printers for optimal performance.

In conclusion, resin printing is a great way to create highly detailed and intricate objects. Each type of printer has its own strengths and weaknesses, so it is important to choose the right one for your needs. By doing your research and selecting the right type of resin printer, you can unlock your creativity and bring your ideas to life.

Getting started with your first 3D printer

Unboxing and setting up your printer.

Congratulations on your new 3D printer! Here are some steps to help you get started:

  1. Unboxing and inspecting: Carefully unbox the printer and inspect all the contents to ensure that everything is present and undamaged. Most 3D printers come with a manual, power cord, USB cable, and some sample filaments. Make sure that you have all of these items.
  2. Choose a location: Choose a location where you can set up your printer. Make sure the location is flat and stable, and provides easy access to a power outlet.
  3. Assemble the printer: Follow the manufacturer’s instructions to assemble the printer. This can include attaching the spool holder, leveling the print bed, and installing any extruders or other components.
  4. Connect the printer: Connect the printer to a power outlet and turn it on. Connect the printer to your computer using the USB cable. Some printers may also have a Wi-Fi or Bluetooth option for connecting to a computer or smartphone.
  5. Install software: Install the software that came with your printer or download it from the manufacturer’s website. This software will allow you to control the printer and create 3D models.
  6. Test the printer: Before you start printing, it’s a good idea to do a test print to make sure everything is working correctly. The manufacturer’s instructions should include a test print file that you can use.
  7. Load filament: Load the filament into the printer according to the manufacturer’s instructions. Make sure that the filament is inserted correctly and that there are no tangles or knots.
  8. Start printing: You’re now ready to start printing! Use the 3D modeling software to create or download a 3D model, and then use the printer software to send the model to the printer.

Remember to be patient and take your time when setting up your printer. Don’t be afraid to ask for help if you need it, and always follow the manufacturer’s instructions. With a little practice, you’ll be creating amazing 3D prints in no time!

Introduction to 3D Printing with Resin

Resin 3D printing, also known as stereolithography (SLA) or digital light processing (DLP), is a type of 3D printing technology that uses a liquid resin as the printing material.

With resin 3D printing, a digital model is sliced into thin layers, which are then projected onto the surface of a liquid resin using a light source. The light causes the resin to harden and solidify, layer by layer, until the entire object is formed.

Both SLA (Stereolithography) and DLP (Digital Light Processing) are 3D printing technologies that use photopolymer resin as the printing material. The main difference between the two lies in how the resin is cured to form the 3D object.

In SLA, a laser beam is used to selectively cure the resin layer by layer, based on the design. The cured resin hardens and adheres to the build platform, and the process repeats for each subsequent layer until the entire object is complete.

In DLP, a projector shines a UV image of each layer onto the resin, which is then cured all at once. This means that DLP printers can often print faster than SLA printers, but the surface finish may not be as smooth.

Overall, both SLA and DLP produce high-quality prints with fine details, but SLA may be better suited for complex geometries and intricate details due to its precision, while DLP may be faster and more cost-effective for larger prints.

Things to Consider for 3D Resin Printer Beginners

  • Safety precautions: It is important to take appropriate safety measures when working with resin, such as wearing gloves and protective eyewear, ensuring proper ventilation, and disposing of resin waste properly.
  • Post-processing: After printing with resin, the finished object may require additional post-processing steps such as cleaning, curing, and sanding to achieve the desired final result.
  • Cost considerations: While resin printing can produce high-quality prints, it may also be more expensive than other forms of 3D printing due to the cost of resin materials and the need for specialized equipment.
  • Environmental impact: Some resin materials may have a negative impact on the environment, and it is important to research and consider environmentally-friendly options.
  • Maintenance: Like any piece of equipment, resin printers require regular maintenance and upkeep to ensure they continue to function properly and produce high-quality prints. This may include tasks such as cleaning the printer and replacing parts as needed.
  • Software and design considerations: In addition to learning how to use the printer itself, users will also need to become familiar with the software used to design and prepare 3D models for printing.

Cost of a Resin 3D Printer

The cost of a resin 3D printer can vary widely depending on factors such as the brand, size, and capabilities of the printer. Generally, resin printers tend to be more expensive than their FDM (filament-based) counterparts, but they are also capable of producing higher quality prints.

Entry-level resin 3D printers can cost anywhere from $200 to $500. These printers typically have a smaller build volume and may have more limited capabilities, such as lower resolution or slower printing speeds.

Mid-range resin 3D printers can cost anywhere from $500 to $2,000. These printers tend to have larger build volumes and more advanced features such as higher resolution, faster printing speeds, and more sophisticated software.

High-end resin 3D printers can cost upwards of $2,000 to $5,000 or more. These printers are typically used by professionals and businesses for applications such as rapid prototyping, jewelry making, and dentistry, and offer the highest levels of accuracy, speed, and versatility.

It’s important to keep in mind that the cost of a resin 3D printer is just one factor to consider when choosing a printer. Other factors such as the cost of materials, maintenance, and ongoing support should also be taken into account.

Resin 3D printing is capable of producing highly detailed, complex, and precise parts with a smooth surface finish. It is commonly used in applications such as jewelry making, dentistry, and prototyping. However, resin 3D printing can be more expensive and time-consuming than other types of 3D printing, and requires more careful handling and post-processing to ensure the final object is fully cured and safe to handle.

The Difference between Resin 3D Printing and Filament 3D Printing

Resin printing is typically done using a technology called stereolithography (SLA) or digital light processing (DLP), which use liquid resin that is cured by UV light to create solid objects. Resin 3D printing is capable of producing highly detailed, complex, and precise parts with a smooth surface finish. It is commonly used in applications such as jewelry making, dentistry, and prototyping. However, resin 3D printing can be more expensive and time-consuming than other types of 3D printing, and requires more careful handling and post-processing to ensure the final object is fully cured and safe to handle.

Filament printing is typically done using a technology called fused deposition modeling (FDM), which extrudes melted plastic filament layer by layer to create objects.

Setting Up a New Printer

The time it takes to set up a resin 3D printer can vary depending on the specific model and the level of experience of the user. However, most resin 3D printers come with clear instructions and are designed to be relatively easy to set up and get started with.

Steps involved:

  1. Unboxing: Remove the printer and all the components from the packaging.
  2. Leveling: Level the build platform to ensure the print bed is flat and level.
  3. Calibration: Calibrate the printer to ensure that it is properly aligned and the build plate is at the correct height.
  4. Resin filling: Fill the resin vat with the resin of your choice, taking care to avoid any bubbles or debris in the vat.
  5. Slicing: Use a slicing software to prepare your 3D model for printing, and transfer it to the printer’s SD card.
  6. Printing: Insert the SD card into the printer, select the desired file, and start the print.

The entire setup process can take anywhere from 30 minutes to several hours, depending on the specific printer and the level of experience of the user. However, once the printer is set up and calibrated, the printing process itself is usually quite straightforward and can be completed in a matter of hours, depending on the size and complexity of the print.

Pitfalls to Look Out For and to Avoid

Expectations:

  • 3D printing can produce high-quality and detailed prints, but it requires some level of learning and experimentation.
  • Resin printing may produce a strong odor and require careful handling to avoid any health risks.
  • The post-processing of prints, such as cleaning and finishing, can be time-consuming and messy.
  • While the technology has come a long way, failed prints and wasted material can still be an issue.

How to Avoid:

  • Do your research and choose a reliable and well-reviewed printer to ensure a smoother printing experience.
  • Take the time to learn about the different materials and settings to optimize your prints.
  • Take necessary safety precautions when handling resin, such as wearing gloves and using a well-ventilated area.
  • Follow proper cleaning and post-processing procedures to avoid any messy or time-consuming mistakes.
  • Don’t be discouraged by failed prints. Troubleshooting and experimentation are part of the process, so stay patient and persistent.

Overall, 3D printing can be a rewarding hobby or profession, but it does require some learning, patience, and attention to detail. By being aware of potential pitfalls and taking the necessary precautions, you can enjoy the benefits of 3D printing and produce high-quality prints

Careers for 3D Resin Printing Experts

Having advanced resin 3D printing experience can open up various job opportunities in different industries. Here are some examples:

  1. Industrial design: You can work as an industrial designer, creating prototypes and mock-ups for new products using resin 3D printing technology.
  2. Manufacturing: You can work in manufacturing, using resin 3D printing to produce parts and components for a range of industries, including aerospace, medical, and automotive.
  3. Jewelry design: You can work as a jewelry designer, creating custom pieces using resin 3D printing technology to create intricate and detailed designs.
  4. Architecture: You can work in architecture, using resin 3D printing to create scale models of buildings and structures.
  5. Education: You can work in education, teaching students about resin 3D printing and how to use it to create complex designs and objects.
  6. Research and development: You can work in research and development, using resin 3D printing to create prototypes and test models for new products and technologies.
  7. Art and sculpture: You can work in the art and sculpture fields, using resin 3D printing to create unique and intricate pieces that would be difficult or impossible to create by hand.

Overall, the possibilities are vast and varied, and the field of resin 3D printing is still rapidly evolving, which means there are always new and exciting opportunities on the horizon.